


Summary
This tutorial covers working with Material DataGrid (x-data-grid) in Remix (remix.run). It will cover standard DataGrid render, and then also using Remix Loader to render the DataGrid. This tutorial will cover JavaScript.
We will create this DataGrid in this tutorial

I created this tutorial after personally adding DataGrid to a Remix project I'm working on where I'm pulling data from a SqlLite Database using Prisma. I wanted to use DataGrid to display the data in the admin dashboard. From this I created a quick tutorial to hopefully benefit at least one other person with the same goal in the future.
Github Code Links:
Phase One: github.com/cbenjamin2009/Remix-DataGrid-Exa..
Finished: github.com/cbenjamin2009/Remix-DataGrid-Exa..
What is DataGrid?
Material UI DataGrid is an extremely powerful table grid layout for data in a React based project. It's very simple to use, comes with a free and paid version, and can be adapted into a Remix project with ease. See MUI for Further
Getting Started Phase-One
First we will need to setup our Remix project using default basic application and JavaScript type.
npx create-remix@latest
Then we will install Material UI and DataGrid dependencies
npm i @mui/material @mui/x-data-grid @emotion/react @emotion/styled
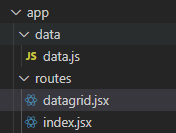
Let's create a new file under routes called datagrid.jsx
Setup the base file as such:
import { DataGrid } from "@mui/x-data-grid";

export default function Index() {
    let rows = [];
    let columns = [];
 return (
    <div>
        <header>
        <h1>DataGrid Component</h1>
        </header>

        <section id="DataGrid" style={{ height: 350, width: '50%', marginLeft: 'auto', marginRight: 'auto' }}>
            <DataGrid rows={rows} columns={columns} sx={{backgroundColor: "#caffca"}}/>
        </section>

    </div>
  )
}
For DataGrid to work, it requires at least a height in it's parent container, and information for the rows and columns. In this case we are going to set the height of the parent section to 350px and the width to 100%. We are going to pull the rows and columns. Let's add that data now.
Rows are key-value pair objects, meaning you must map the column names to their values. Each row should contain an 'id' reference. We will then use these row names for the columns property. Update rows as follows:
    let rows = [
        { id: 1, firstName: 'Jamaal', lastName: 'Gorczany',  email: 'jg@example.com' },
        { id: 2, firstName: 'Deon', lastName: 'Jast', email: 'dj@example.com'},
        { id: 3, firstName: 'Francisca', lastName: 'Lowe', email: 'fl@example.com'},
        { id: 4, firstName: 'Christine', lastName: 'Hermiston', email: 'ch@example.com'},
        { id: 5, firstName: 'Gunner', lastName: 'Will', email: 'gw@example.com'},
        { id: 6, firstName: 'Ereyn', lastName: 'David', email: 'ed@example.com'},
        { id: 7, firstName: 'Ambrose', lastName: 'Johnston', email: 'aj@example.com'},
        { id: 8, firstName: 'Telly', lastName: 'Witting', email: 'tw@example.com'},
        { id: 9, firstName: 'John', lastName: 'Gutman', email: 'jg@example.com'},
        { id: 10, firstName: 'Spencer', lastName: 'Kemmer', email: 'sk@example.com'},
        { id: 11, firstName: 'Holly', lastName: 'Parisian', email: 'hp@example.com'},
        { id: 12, firstName: 'Jonas', lastName: 'Ambrose', email: 'ja@example.com'},
        { id: 13, firstName: 'Mark', lastName: 'Smith', email: 'ms@example.com'},
        { id: 14, firstName: 'Carole', lastName: 'Spencer', email: 'cs@example.com'},
        { id: 15, firstName: 'Rebecca', lastName: 'Nelson', email: 'rn@example.com'},
    ];
Now let's update the Columns based on the rows. We know we will need a firstName, lastName, and email field. We will also set flex so the columns can grow if needed
    let columns = [
        {field: 'firstName', headerName: 'First Name', flex: 1},
        {field: 'lastName', headerName: 'Last Name', flex: 1},
        {field: 'email', headerName: 'Last Name', flex: 1},
    ];
Let's have a run to see how our site looks. Open the console and type npm run dev
- Note at the time of writing there is an issue with Remix github
Unexpected Server Error TypeError: isbot is not a functionentry.server.jsxfile and modify the lineconst isbot = require("isbot").default;toconst isbot = require("isbot"); // remove the .default;
If you followed along with this tutorial, you should receive this result:
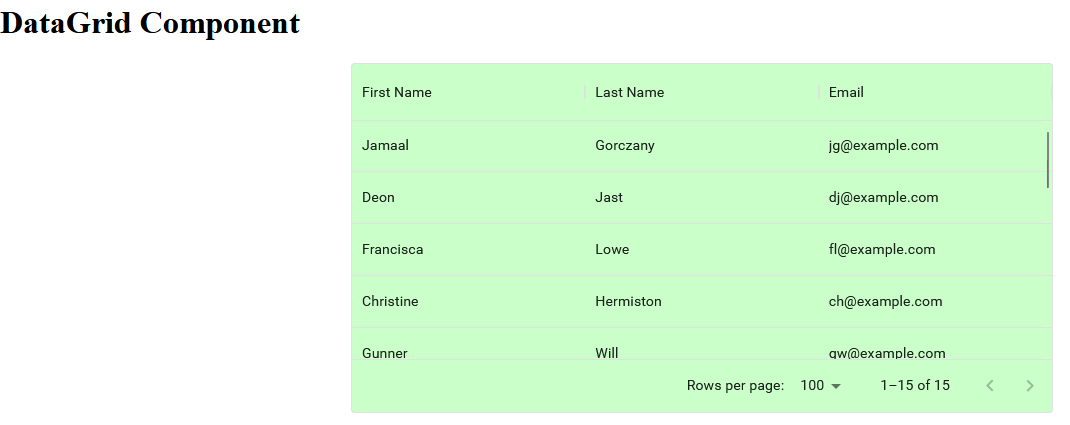
You have completed Phase-One of the tutorial. Your code should match the Phase-One branch in the Github repo if you are having any difficulties please compare your code to this repo.
Loading data using Remix useLoaderData()
With Remix we have the useLoaderData() function for pulling in data. This could be pulling in data from a database or from an API or from a local file. Regardless of the source, we can use this function to pull in our row data to be mapped to the DataGrid. This tutorial will keep it simple and pull the data from a local file that contains our data.
Create a new folder called data in the app folder.
Create a new file called data.js in the data folder
Inside Data.js update with the same data we used previously as follows:
const sampleData = [
    { id: 1, firstName: 'Jamaal', lastName: 'Gorczany',  email: 'jg@example.com' },
    { id: 2, firstName: 'Deon', lastName: 'Jast', email: 'dj@example.com'},
    { id: 3, firstName: 'Francisca', lastName: 'Lowe', email: 'fl@example.com'},
    { id: 4, firstName: 'Christine', lastName: 'Hermiston', email: 'ch@example.com'},
    { id: 5, firstName: 'Gunner', lastName: 'Will', email: 'gw@example.com'},
    { id: 6, firstName: 'Ereyn', lastName: 'David', email: 'ed@example.com'},
    { id: 7, firstName: 'Ambrose', lastName: 'Johnston', email: 'aj@example.com'},
    { id: 8, firstName: 'Telly', lastName: 'Witting', email: 'tw@example.com'},
    { id: 9, firstName: 'John', lastName: 'Gutman', email: 'jg@example.com'},
    { id: 10, firstName: 'Spencer', lastName: 'Kemmer', email: 'sk@example.com'},
    { id: 11, firstName: 'Holly', lastName: 'Parisian', email: 'hp@example.com'},
    { id: 12, firstName: 'Jonas', lastName: 'Ambrose', email: 'ja@example.com'},
    { id: 13, firstName: 'Mark', lastName: 'Smith', email: 'ms@example.com'},
    { id: 14, firstName: 'Carole', lastName: 'Spencer', email: 'cs@example.com'},
    { id: 15, firstName: 'Rebecca', lastName: 'Nelson', email: 'rn@example.com'},
]

export default sampleData;
Let's go back to the datagrid.jsx file and begin to pull the data from this file.
Update the imports
import { DataGrid } from "@mui/x-data-grid";
import { json } from "@remix-run/node";
import { useLoaderData } from "@remix-run/react";
import sampleData  from "~/data/data"
Now create the loader function to load our sampleData
export async function loader() {
    return json(sampleData);
}
Perfect, now we can pull this loaderData by updating the Index() function as follows
export default function Index() {

    let data = useLoaderData();
    //row data contains a unique ID for each row and sample data with first name, last name, and email address
    // map through our loaded data and return the row fields
    let rows = data.map((user) => {
        return {
            id: user.id,
            firstName: user.firstName,
            lastName: user.lastName,
            email: user.email,
        }
    })
    // column fields must match row fields, you can assign a header for each column and size if desired
    let columns = [
        {field: 'firstName', headerName: 'First Name', flex: 1},
        {field: 'lastName', headerName: 'Last Name', flex: 1},
        {field: 'email', headerName: 'Email', flex: 1},
    ];
return (
...
)
}
Check your finished result, run npm run dev again if needed and you should have the exact same result.
Your code should now match that of the Master branch on the Github repo. If you are having difficulties refer to the master branch.
Conclusion
Material UI DataGrid gives you quick access to sorting, filtering, pagination, toolbar, searching, and so much more. Remix can be combined with DataGrid to instantly fetch and render data in a DataGrid providing lightning fast data grids. It only take a few quick changes to begin pulling in the data in Remix from another source and rendering that content in the rows.
I do hope that you find the tutorial useful, share it with your circle on social media! I'd like to hear any feedback, comments, criticism, suggestions, etc. that you can offer.